Banana Bread

Banana Bread

Banana Bread

When you buy a lovely bunch of bananas, there are always a few at the end that get overripe. For me, the baking stars align when you have a fruit bowl full of over ripe bananas and a desire to bake something! After trying several banana bread recipes over the years and going through the one that was too soft, too hard, not banana-y enough, Goldilocks has finally found the perfect recipe.

This recipe turns out EXACTLY like the ones from the cafe’s, with the added bonus that it’s the easiest possible cake recipe i have ever used. You don’t need to cream and fluff anything separately, all the ingredients are plopped into the bowl of your favourite mixer and away we go! A friend of mine who is not a baker at all regularly makes this banana bread for her family so this recipe is definitely appropriate for beginner bakers!

ENjoy and happy baking all xx

Ingredients
125 g butter, room temperature, cubed
1 tsp vanilla essence
2 eggs
1/2 cup caster sugar
1.5 cups mashed banana (about 3)
1.5 cups self raising flour
1 tsp bicarbonate soda
1 tbspn milk

Method
1. pre heat the oven to 180 degrees non fan forced

2. Place all ingredients into the bowl of an electric mixer

3. Mix on medium speed until the colour of the batter changes

4. in the meantime oil and flour a loaf pan (approx 20-25 cm in length)

5. Pour the batter into the loaf pan and place in the middle of the oven for 1 hour or until a skewer comes out clean.

6. Turn out and Cool on a wire rack before cutting for best results

Enjoy!

Apple and Cinnamon Cobbler

I’ve always liked the idea of a Cobbler – i’ve heard it referred to in books, but I was never quite sure what it was, I knew that it was similar to a Crumble which is one of mine and my husband’s favourite winter desserts. I came across a picture of a cobbler that showed me the luscious scone like batter sitting atop gorgeous stewed fruit…OMG it looked like heaven on earth. Here is my version of an apple cobbler, where the apples are stewed with lots of cinnamon and the scone like batter is baked on top of the fruit in the oven, so the result is a stunning pastry top that has soaked in the apple and cinnamon juices at the bottom. Serving with ice cream is a must! From my family to yours, enjoy and happy cooking.

Apple and cinnamon cobbler

Apple and cinnamon cobbler

Ingredients

For the filling
5 firm eating apples (I used Royal Gala) , peeled, cored and roughly chopped
1/4 cup sugar
2 tsp cinnamon
1/2 cup water
1 tbspn corn flour

for the pastry
1 1/2 cups all-purpose flour
2 teaspoons baking powder
1/2 teaspoon salt
115 g (4 oz) unsalted butter, cut into small piece
1 cup thickened cream (plus a bit more for brushing over the top)

Method

1. Pre-heat the oven to 180 degrees celsius
2. Stew the apples by Placing all the ingredients except for the corn flour into a pot over low to medium heat
3. Stir to combine and cover, leave for 5-7 minutes or until the apples are starting to soften but before they become mush
4. Once the apples have reached desired texture, add the corn flour and mix through
5. Place in the bottom of a casserole dish

Stewed cinnamon apples

Stewed cinnamon apples

5. Make the dough by combining the flour and butter in a food processor (if you dont want to use your food processor, cut the butter into the flour with a pastry cutter or crumble the mixture with your fingers)
6. Place the mixture in a bowl then slowly add the thickened cream until a dough forms, knead it into a big ball
7. Divide the mixture into golf ball size pieces

Cobbler topping

Cobbler topping

8. Place the balls on top of the apple mixture spaced equidistance apart from each other, as the dough cooks it will expand and fill the top of the cobbler completely

IMG_5684

9. Brush the top of the pastry with thickened cream

10. Place in the oven for about 45-50 minutes

11. When the top of the cobbler is starting to become golden brown, remove from the oven, leave to cool a tiny bit then Serve with Ice cream

Enjoy and happy cooking xx

IMG_5692

Creamy blue cheese and mushroom risotto

I love a good risotto. In this one, the earthy mushroom flavour is a perfect foil for the tangy saltiness of the blue cheese. The addition of cream tempers the blue cheese down to make it milder and easier to enjoy. I served this alongside a beautiful marinated chicken schnitzel! I hope that you enjoy

Ingredients

1.5 cups arborio rice
1-2 tbsp olive oil
dollop of butter
200 g button mushrooms, sliced
1 small onion, finely diced
2 tsp garlic cloves, minced
3/4 cup white wine
4 cups vegetable stock, warmed in a jug in the microwave
150ml double cream
50 g mild blue cheese
Small handful fresh parsley leaves, finely chopped

Method

  1. Heat the butter and 1 tbsp of the oil in a pan, add the mushrooms, season with salt and freshly ground black pepper and pan-fry until golden brown, set aside,
  2. Add the remaining oil to the pan and soften the onions and garlic over a low heat for 5 minutes. Stir in the rice and toast for a couple of minutes until opaque, then add the wine and allow to absorb,
  3. Gradually pour hot stock to the pan, about half a cupful at a time, waiting until it has been absorbed by the rice before adding another. When you see the texture of the rice change, test to see if it is cooked to your liking.
  4. Remove from the heat, stir through the cream and season well with salt and ground black pepper. Fold through the mushrooms, blue cheese and parsley, then divide among plates and serve.

    Happy cooking πŸ™‚

Creme Brulee Tarts

Creme Brulee tart using Careme Vanilla Sweet Shortcrust pastry

Creme Brulee tart using Careme Vanilla Sweet Shortcrust pastry

I love working with pastry, I mean I LOOOOVE it. There is nothing quite like the feeling of taking some flour, butter and sugar turning into a flaky buttery crispy thing that become the perfect vessel for a chocolatey delight, cream and berries, caramel, mousse or in this case a gorgeous creamy creme brulee. The idea for this tart started with the pastry. I made a vanilla shortcrust pastry that was particularly mind blowing for a pear and chocolate frangipane tart, but i knew the pastry would be transcendant if filled with a custard, but not just any custard the queen of all custards : CremeΒ BrΓ»lΓ©eΒ  The results were amazing and I’m so happy to be sharing them with you πŸ™‚ As much as I adore making pastry from scratch – most of the time I dont have that kind of luxury, which is frustrating for someone who adores pastry as much as me. I recently discovered Careme Traditional pastry (which is a handmade pastry company based in the Barossa Valley) the type of pastry they have on offer was enough to prove to me that these are my kind of people that know what they are doing. Β The first pastry I tried was their dark chocolate pastry. I wanted to create something wicked and decadent, and there is nothing more wicked and decadent than my salted caramel and chocolate ganache tart Β (http://wp.me/p3xk6X-1c) that turned out so well, i had to try substituting my labour of love sweet shortcrust pastry for the vanilla bean shortcrust pastry by Careme. I was so satisfied with the results I comfortably recommend it to everyone!

Ingredients

for the pastry
1 packet Careme Vanilla bean Shortcrust Pastry

for the CremeΒ brΓ»lΓ©e
600 ml thickened cream
1.5 tsp vanilla bean paste
8 egg yolks
1/3 cup castor sugar
Extra sugar for browning the top

Method
for the pastry
1. Pre-heat the oven to 180 degrees Celsius

2. Spray 4 pastry tins with oil, and line them with the ready rolled out pastryΒ (this recipe is not recommended for 1 large tart) Β I did it in a rustic style ’cause I was after that look, but you can trim the edges and make it look more dainty if you prefer

3. Prick the pastry with a Β fork all over

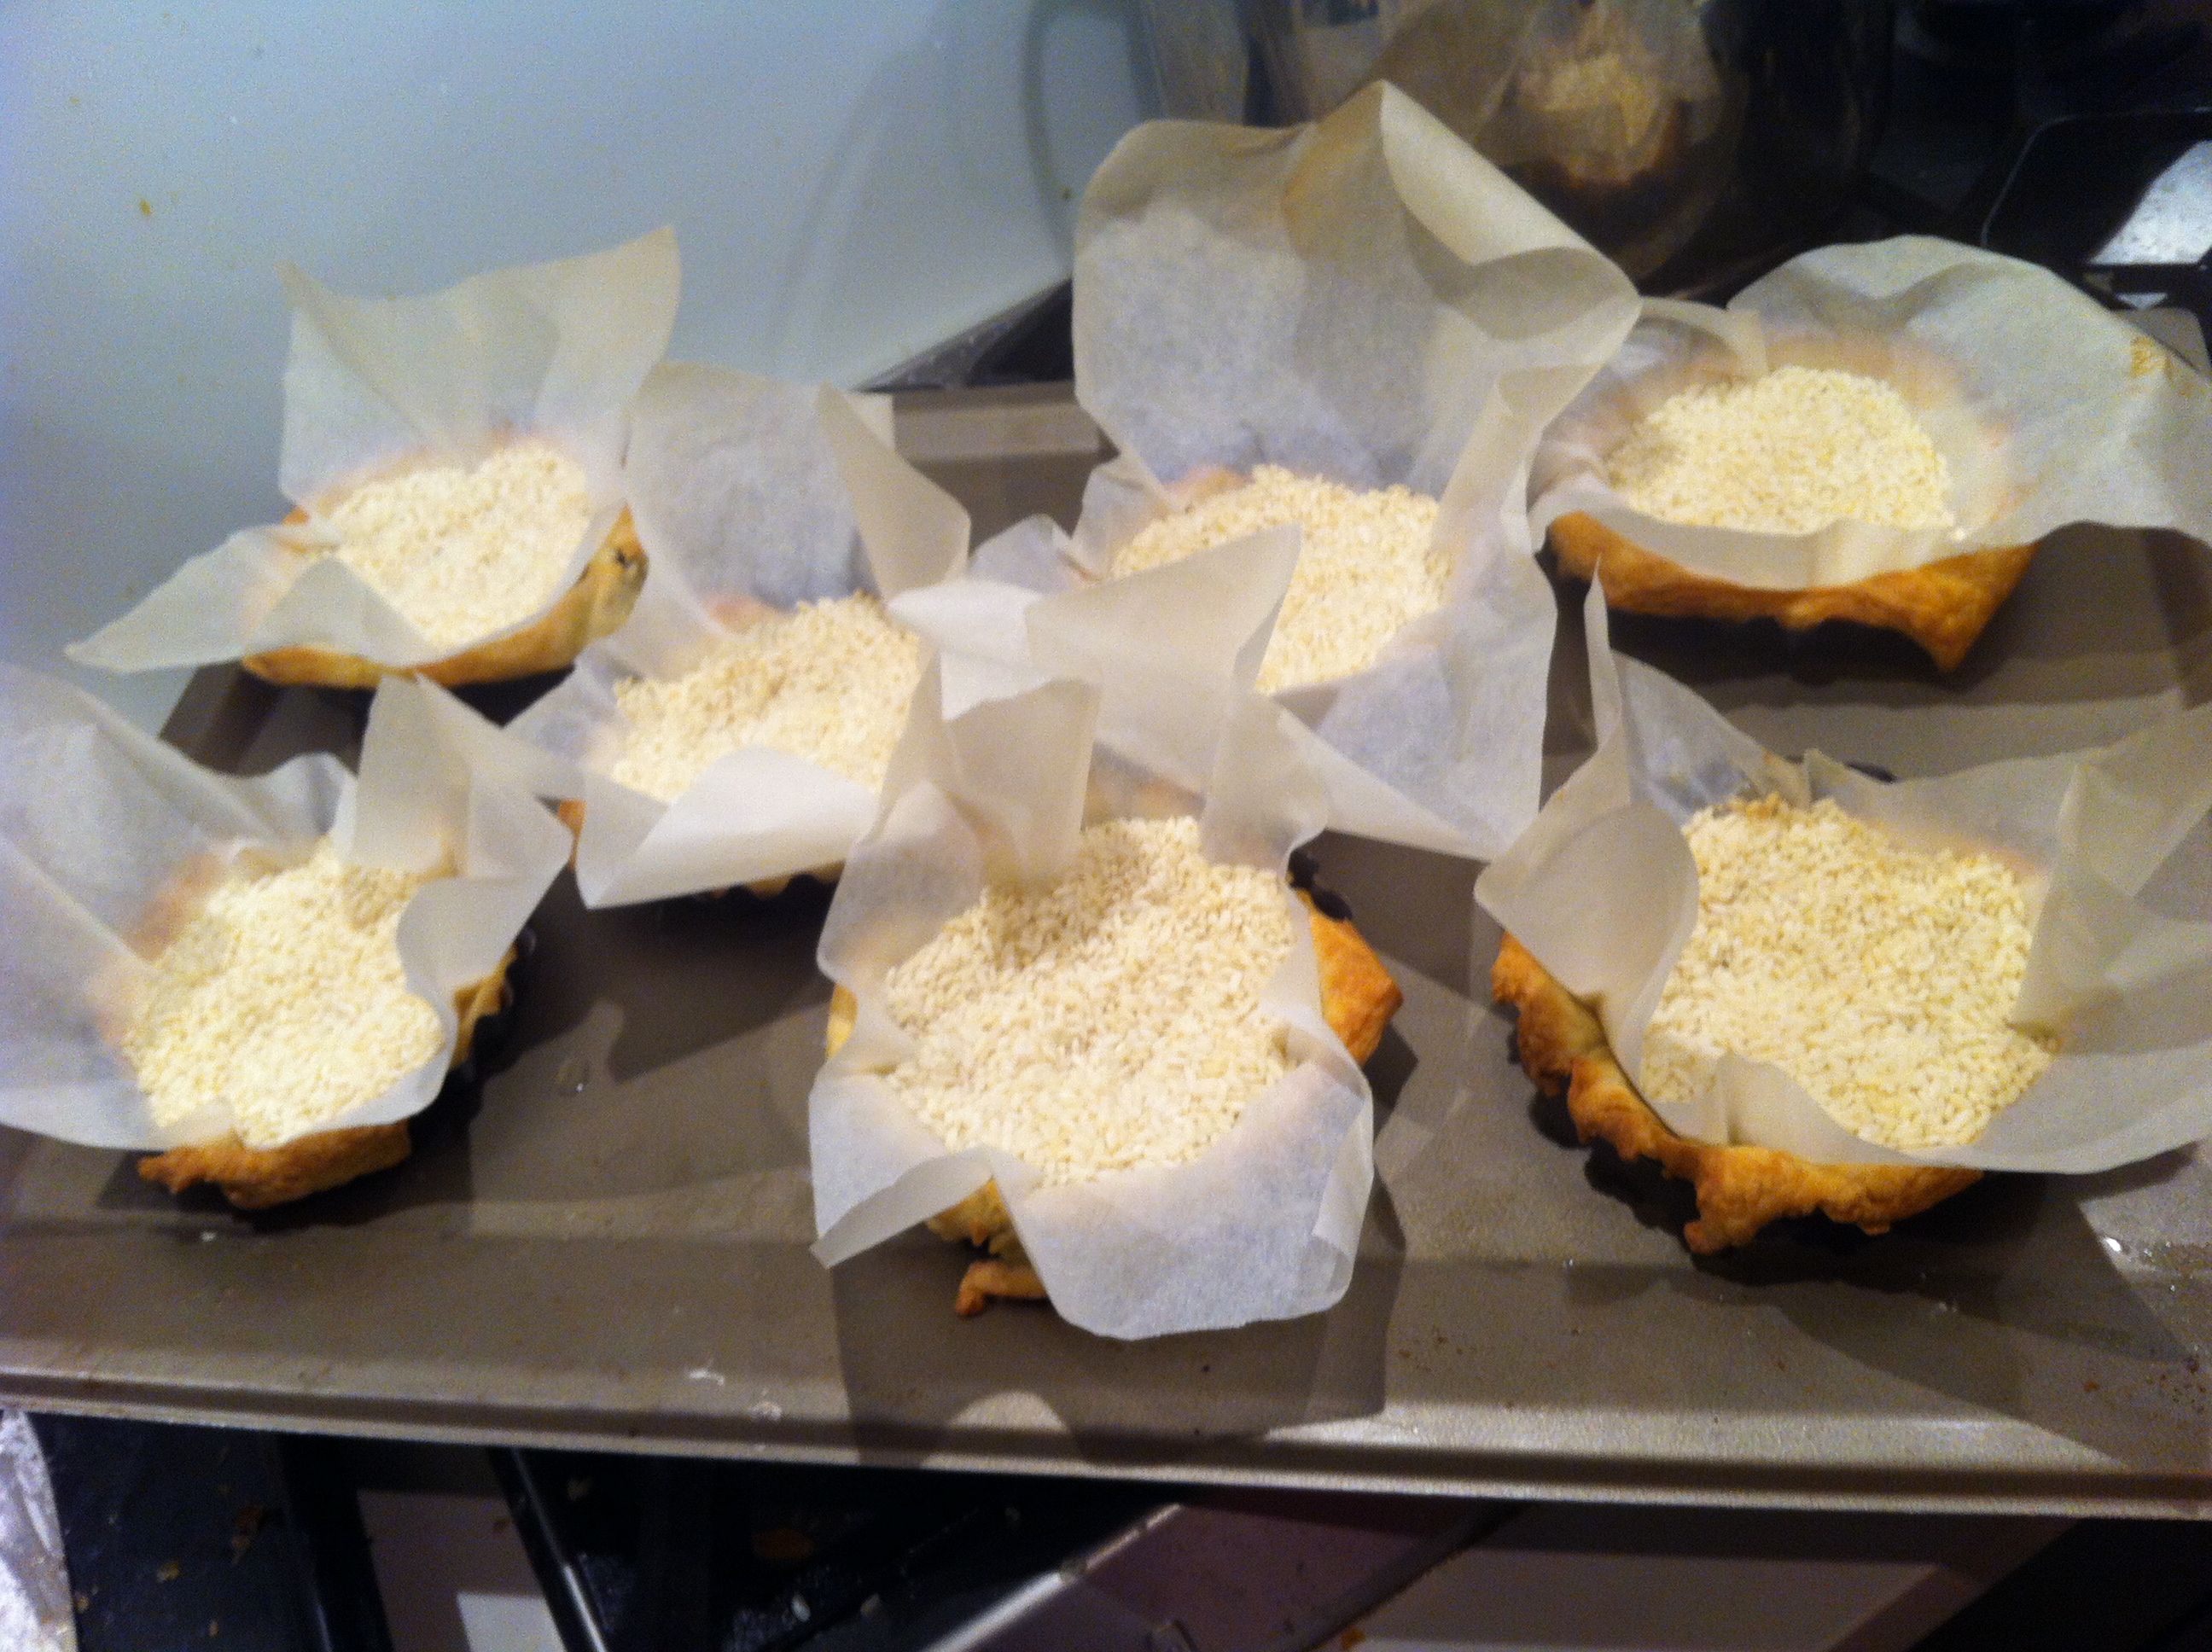
4. Cover each pastry tart with baking paper then fill with baking beads, dried beans, or rice, ensure to press the baking paper down so that the beads are weighing down the pastry

Tart cases - baking blind

Tart cases – baking blind

5. Place the pastry into the oven for 15 minutes or until the edges start to become golden – then remove from the oven and discard the beans and paper

4. While the cases are in the oven, make the crème brulee

Crème Brulee
1. Whisk the egg yolks and sugar well in a large bowl until thick and frothy – be careful not to overwhip

2. Scald the combined cream and vanilla bean paste while stirring

3. Slowly (very, very slowly) pour the scalded cream into the egg mixture while continuing to whisk. Add the cream in batches, whisking well after each addition so that the temperature of the eggs doesn’t come up too quickly otherwise you will end up with vanilla scrambled eggs πŸ™‚

4. Once all the cream has been added, place the mixture back into the pot (which has ideally been rinsed and dried) and continue to stir over low heat until it thickens enough to coat the back of a wooden spoon

5. Remove the pot from the heat and plunge into (a) a sink that is half full of cold water or (b) a prepared large bowl that is filled with ice and water

6. Leave the pot aside until the creme brulee has cooled considerably

Assembly

1. Once the creme brulee has started to cool (ie no steam rises from it when mixing) divide the mixture among the baked pastry cases and cool completely to room temperature

2. Once the creme brulee has cooled and is set, sprinkle the extra sugar on top and brown it with a kitchen grade blow torch ENJOY! Happy cooking from my family to yours xx

Beef Stroganoff

My mum has been making this dish for years! Its a great weeknight meal ’cause its quick. and tasty! Tender strips of beef are cooked in a creamy earthy mushroom sauce flavoured with dijon mustard and Worcestershire Sauce . Said to be the food of russian royalty, it goes just fine for a suburban family πŸ™‚ Some people serve over buttered pasta, I prefer rice, because my people are a rice people!

Be sure to use a lean cut of meat, sliced long and thin to ensure it cooks quickly and doesn’t become chewy. You can also experiment in making this meal with different types of mushrooms to bring out different flavours.

From my family to yours, enjoy and happy cooking xx

ingredients

2 – 1/2 cups beef stock
400 gm sliced mushrooms

3 tablespoons vegetable oil (not olive oil)
1/4 cup unsalted butter
1 kilo rump steak, sliced (purchase just over a kilo, by the time the fat is removed and its sliced it will be a kilo or thereabouts)

Salt and freshly ground black pepper
Β½ cup plain flour
1 medium onion, finely diced
1.5 tablespoons Dijon mustard
1/2 tablespoon Worcestershire sauce
3 tablespoons sour cream

1. Season the beef strips generously with salt and pepper and dredge them in the flour. (I like to put them all in a plastic bag and shake it all about)

2. Heat a deep wide pan to medium-high heat and add the oil. When the oil is very hot, add the beef, spreading it in a single layer and stirring with the wooden spoon so that it browns quickly on all sides, 1 to 2 minutes. Be sure not to overcrowd the pan; work in batches if necessary. SautΓ© the beef just long enough so that it browns slightly on all sides; don’t overcook it. Transfer the to the side for the moment

3. Melt the butter in the pan and add the onion. SautΓ©, scraping up the browned bits in the bottom of the pan with the wooden spoon, until the onion just begins to brown, 4 to 5 minutes.

4. Add the mushrooms and stir 1 to 2 minutes.

5. Pour in the beef stock. Stir in the mustard and Worcestershire sauce and add back the beef.

6. Bring to a simmer while stirring. Reduce the heat to low cover the pan, leave to simmer about 5 minutes.

7. Once the beef is cooked stir in the sour cream, cooking just until heated through. Taste and adjust the seasonings. Serve over buttered egg noodles or boiled rice, sprinkled with the parsley.

Quick prawns with red peppers

Sometimes we have time for a thought out gourmet meal and sometimes we need a quick dinner when you have to use what you have in the fridge/pantry. I love frozen prawns ’cause they last a long time in the freezer and they cook super quick!

A perfect throw together meal for a weeknight πŸ™‚ Enjoy!

IMG_5578

Ingredients
500 g frozen prawns
2 tbps olive oil
1 red pepper, diced finely
1 onion, diced finely
2 cloves crushed garlic
1 tablespoon tomato paste/puree
3/4 glass white wine
1 tablespoon vegan sour cream or regular sour cream

Method
1. heat a deep wide saucepan and add oil

2. Add the pepper, onion and garlic and fry until fragrant

3. add the tomato paste and prawns and stir to combine until the prawns start to become pink

4. Add the white wine, keep stirring until prawns are fully cooked, and season with salt and pepper

5. add a dollop of your cream of choice, adjust seasoning and serve on a bed of rice or with noodles!

Happy cooking xx

Beouf Bourguignon (Beef Burgundy)

This dish was the first meal that I made for my husband in our first apartment…we first tasted it when we went to what is now our favourite French restaurant in Sydney – the meltingly tender beef, the rich hearty oniony sauce atop the fluffiest mash you could find means it was definitely a night to remember! There are many different versions of this recipe around – but I like mine because its simple and classic without too much ‘fusion confusion’ this is also my favourite dinner party dish of all time, its delicious yet cost effective because it uses cheaper cuts of meat, but most importantly Β this dish is easily prepared the day before so you can spend the actual day of the dinner party relaxing with your friends rather than slaving away in a hot kitchen. As with all casseroles, the tastes develop overnight and it will actually taste better the Β next day. Β I hope you enjoy this recipe, from my family to yours!

IMG_5596

Ingredients
1.2 kg chuck/gravy beef diced in big cubes (get your butcher to do this to save time)
90g butter
2 tablespoons oil
12 baby onions peeled and left whole
2 cloves garlic, crushed
300g mushrooms, sliced
1/2 cup flour
2 cups red wine
3 cups beef stock
1 beef stock cube
2 sprigs of fresh thyme
salt, pepper

Method
1.Coat the beef with flour and season with salt and pepper (I like to do this in a bag and shake it all about)

2. Heat 1/3 of the butter and the oil in a cast iron casserole dish and brown the beef in batches, being careful not to overcrowd the pan because that will result in the beef cooking in its own juice which is not at all desireable

3. Once all the meat is browned, add the baby onions (add a little more oil if you need to) followed by the mushrooms and cook until the onions are browned – set these aside with the meat

4. Heat the rest of the butter in the pot, add the garlic and flour and cook without allowing to brown

5. slowly add both liquid and powdered stock Β (which should be at room temperature) as well as the wine and thyme leaves

6. Season with salt and pepper and bring to the boil – the sauce should thicken as it comes to the boil

7. Put the meat and mushrooms back into the pot, and place into a 160 Celsius oven for 1.5 hours

8. Serve with fluffy mash!

Happy cooking xx

Basboosa: a vegan coconut and semolina tart topped with crunchy almonds

There is nothing quite like basboosa – the combination of coconut and semolina baked until golden, then soaked in syrupy deliciousness, topped with crunchy almonds. My mum has made basboosa for years, and the tray rarely lasts 24 hours before its gobbled up. The perfect foil for a cup of coffee, or an after dinner sweetener. There are many different versions of this dessert both vegan and non-vegan, but this version is definitely my favourite.

IMG_3182

Enjoy.

Ingredients
2 cups semolina
1 cup self raising flour
1 cupΒ desiccatedΒ coconut
1 cup vegetable oil
1 cup castor sugar
1 cup coconut milk
150 g almond flakes

Method
1. Pre-heat the oven to 180 degrees
2. Sift the flour, sugar and semolina into a mixing bowl
3. add the coconut and mix to combine
4. Add the oil and coconut milk and mix until homogenous
5. Pour the batter into a lightly oiled tray approx 22cm in diameter
6. Place the tray on the middle shelf of the oven for 30 minutes
7. Remove the tray from the oven, and carefully strew the flaked almonds on top of the tart
8. Put the tart back in the oven on the top shelf for another 15 minutes or until the almonds are golden brown.

While the Basboosa is baking, make the syrup as follows

Ingredients
1 1/2 cups sugar
1 cup water
1 tsp lemon juice
1 tsp vanilla

Method
1. Put all the ingredients into a pot
2. Bring the mixture to a boil until all the sugar is dissolved
3. Make sure the syrup is cool before pouring onto the Basboosa

When the Basboosa is taken out of the oven, pour the syrup over it while it is still hot. My mum says the sure sign of a good basboosa is when you add the syrup and it makes a sizzling sound…and she’s never made a bad basboosa πŸ™‚

From my family to yours πŸ™‚ ENjoy and happy cooking xx

Barbecued Mullet stuffed with carrot, celery, coriander parsley and spices

BBQ'd mullet

BBQ’d mullet

People have a lot to say about Mullet – in Australia it is an inexpensive fish because people consider it too difficult to eat because of the amount of bones that the fish has. Those that are connoisseurs of seafood know better, they know that the time spent gently flaking a well cooked mullet is well worth it to get the pleasures of the delicate flavour and texture, especially when seasoned and cooked well!

The traditional egyptian way of cooking mullet is by barbecuing it, after having coated it in Raw Natural Bran. The Bran protects the fish while it is cooking so that the result is a succulent, fully flavoured sensational fish.

I hope you enjoy this recipe.

Ingredients
6 raw mullets, well cleaned and scaled
1 bunch parsley
1 bunch coriander
2 carrots greated
2 tomatoes diced finely
2 green capsicum diced finely
2 sticks celery diced finely
1 red onion diced finely
3 tsp cumin
2 tsp minced garlic
salt and ground pepper to taste

Raw Natural bran for bbq’ing

Post Marinade
3 cups warm water
3 tbspn mustard
2 tbspn cumin
1/4 cup white vinegar
1/4 cup lemon
salt and pepper to taste

Method
1. Ensure all the mullets have been cleaned well inside and out, season the inside cavity with salt and pepper
2. Combine all the ingredients together to form a ‘salad’ and check for seasoning.
3. stuff the fish with the salad ingredients and dredge in raw natural bran
5. prepare a baking dish with the ingredients of the post marinade combined and mixed well, season to taste
4. BBQ the fishes until they are cooked
5. Once the fish is cooked, dredge in the post marinade and leave for a minute or so, then remove and set aside in a serving dish
6. Serve with onion rice and a crisp salad

Enjoy! Happy cooking xx

Stuffed fishes waiting to be cooked

Stuffed fishes waiting to be cooked

Prawn linguine with tomato, basil, garlic and lemon

Prawn pasta

Prawn pasta

Nothing thrills me more than when a recipe turns out both delicious and easy and fast to make. This prawn pasta recipe is nothing less than a taste sensation in your mouth. The Lemon lifts this dish so much and makes it fresh and vivid, there is a tiny hint of chilli, the basil of course has a summery taste about it and the prawns and cherry tomatoes are the main stars. I highly recommend trying this dish!

Ingredients
1 packet linguine
1 large red onion diced finely
1 lemon, zest and juice
1/2 bunch basil chopped finely
1 tsp dried chilli flakes

3Β tbspΒ olive oil
3 large cloves garlic, bruised and sliced finely
2 punnets cherry tomatoes, halved
500 g frozen peeled prawns

Method
1. Start the sauce by sauteeing the red onion until beginning to soften, then add the garlic and sautee until fragrant

2. Add the tomatoes, lemon juice, 3/4 of the basil and chilli flakes and sautee until combined

3. add the prawns and continue to stir as they cook, once they start turning pink, season well with salt and set aside off the heat

4. Boil the linguine in well salted water, and drain

5. Toss the pasta sauce in a pan with the pasta, and fold in the rest of the basil.

6. Serve immediately!

Enjoy πŸ™‚ Happy cooking xx